Achieving Quick and Beautiful Brightwork with Varnish Over Epoxy
- John Mario

- Aug 9, 2025
- 4 min read
Who doesn't love a perfect varnish job. Its truly a sight to behold. A crappy varnish job is truly a sight to unsee! For those who follow my many projects on this website and our Facebook groups, you know my wheelhouse lies in the mechanical and electrical systems throughout the boat. I admittedly fall short in the carpentry department, but I'm hoping to change that.
After 1968 Chris Craft moved from mahogany to Formica. I believe the alure of maintenance free brightwork and cost reduction were likely the reasons why, but that is pure speculation on my part. Nonetheless, the Formica in my Commander looks absolutely terrible and really lets down the appearance of the boat. I am out to change that.
As with any project of uncharted technical territory, I like to start small so I can develop my skills and allow for re-do's if I totally screw things up. I decided to replace my helm brightwork with real mahogany and finish it using a technique I learned about by watching Boatworks Today on YouTube: The varnish over epoxy method.
Before we get into that, I will walk you through what was there and the fabrication of the new pieces.

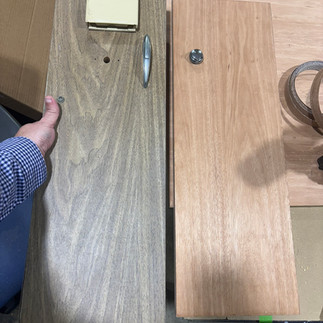
I started out with the intent to strip the Formica off the plywood doors and replace it with mahogany veneer. After butchering this attempt, I opted to build new ones using 3/4" mahogany plywood and matching edge banding.
The cuts were made with a simple table saw. An iron is used to apply the edge banding similar to the way a decal is applied to a t-shirt if you can remember the 80's. Be sure to use edge banding that is slightly wider than the thickness of the plywood and slightly longer so you can trim it after. A sharp pair of straight cutters leaves a clean edge at the ends of the sides. I bought an edge banding trimmer off Amazon (the blue thingy pictured below) that gets run across the edge banding and leaves a perfect edge at the top and bottom sides of the plywood.
Lastly, a new latch was installed in place of the original.


Now lets make everything shiny!
I researched a varnishing method that uses epoxy first to build film thickness quickly and finishing with varnish. Epoxy does not resist UV and will yellow over time if not top coated with something like varnish. Varnish provides the color and UV protection. So why not just varnish only? You can. In fact, that's been the preferred method since the beginning of time. But speaking of time, building an adequate film thickness using varnish alone can take 8, 10 or even 12 coats. 1-2 coats per day is about all you get with traditional varnish so it cold take upwards of a week to varnish a new piece. I also like the idea of encapsulating wood in epoxy. It makes it virtually rot-proof.
My epoxy of choice is West Systems 105 resin and 207 Special Clear hardener. Its important to use the 207 vs the 205 because the 207 dries crystal clear.

I poured the mixture on the surface and troweled it out using a foam brush, then tipped it off with a cheap disposable chip brush to pop the champagne bubbles that were lingering on the surface. I held a propane plumbers torch about 10 inches from the surface to pop any remaining bubbles before the epoxy kicked. BE SURE TO KEEP THE TORCH MOVING! If its held too close or stopped over an area it will scorch the epoxy and you will have to start over. I applied two coats of epoxy, 3 hours apart using this method.


After letting the epoxy cure for 48 hours, I sanded the surface with 220 grit to knock down any runs or dust nibs. If using a random orbital sander, stay away from the edges and do those by hand or you risk blowing through the coating as its generally thin at the edges. The goal of sanding is more to provide a key for the varnish to bite to and less about making it perfectly flat like the automotive bodywork.
My varnish of choice is TotalBoat Lust high gloss spar varnish. I really like this product in that it can be overcoated in an hour at 72 degrees and it flows out really nice. It has an amber tint to it that really makes the mahogany look warm without looking orange. Lust is a little thicker than most varnishes so I chose to thin it with 10% of the TotalBoat Special Brushing Thinner 100 to promote flow out. I don't recommend thinning it any more than that or you will create more work for yourself in the form of additional coats.

I applied three coats of Lust thinned at 10%, one hour apart using a badger hair brush. The key is to keep moving and always brush towards to edges. If you drag the brush over the edge you will unload the brush and have runs down the side of the piece. Also don't overwork the varnish. Lay it down and move on and don't go back unless you absolutely have to. Don't worry about brush strokes, those will disappear as the varnish flows out during the drying process.


What a difference between Formica and real mahogany! I left the varnished pieces to dry for 24 hours before installing on the boat.

Is this a perfect, flawless job? Close, but no. Did I learn a lot? YES! It was the perfect sized project to develop technique and prepare myself for the next big project with is the remaining aft deck Formica pieces which I plan to conquer over the winter.
For those of you who have been thinking of doing this but are unsure of their ability, buy yourself some scrap mahogany, teak or really any other wood and perfect your method before diving into the real pieces. You'll be surprised how easy it is using a little technique and patience!


Comments