How To: Electric Fuel Pump Conversion
- John Mario

- Aug 23, 2025
- 7 min read
There are several electric fuel pump conversion stories floating around the Internet. Some good, some ugly. This blog details the correct way to maximize the benefits of converting from mechanical to electric fuel pumps for your carbureted marine inboard gasoline engine.
Before we get into the how, lets talk about the what and why. A mechanical fuel pump is a simple and generally reliable device that is mechanically coupled to the rotational movement of the engine to which it supplies fuel. A diaphragm inside the pump body moves up and down with each revolution of the engine, drawing fuel in from the gas tank and out to the carburetor. This repeated motion ensure a continuous flow of fuel to the carburetor, keep its bowls filled and the engine adequately fed.

This sounds like a solid solution to a simple problem, so what gives? Well, nothing gives necessarily. The problem is specific to engines that go long periods between use. Whether your waking a classic car or a gasoline powered boat after a long winter's nap, that initial start generally takes a whole lot of cranking. This is because over time the fuel evaporates from the carburetor bowls and they must first be refilled before fuel can reach the engine for starting. With the onset of modern fuels containing ethanol, the rate of evaporation sharply increased to where this phenomenon can happen in as little as a few days. What this means for the weekend warrior boaters with mechanical fuel pumps is a whole lotta cranking going on. This is especially hard on starters and batteries and totally unnecessary if the carburetors could be filled with fuel ahead of time. Good news is, they can!
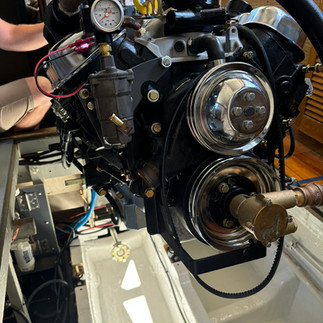
I am writing this blog after designing and implementing the following solution on my 1972 Chris Craft 41 Commander with twin big block Chevy gasoline inboard engines.
What you need for one engine:
1 Walbro FRB-13 electric fuel pump
1 Aeromotive 13215 marine fuel pressure regulator
1 Aeromotive 15632 0-15 psi fuel pressure gauge
Misc. brass or stainless NPT and NPT to 3/8" or 5/16" hose fittings (size depends on your application)
1 Revolution Electronics 12003 fuel pump safety switch
1 Anti-siphon valve
3/8" or 5/16" A1 marine fuel hose (size depends on your application)
1 Pegasus Auto Racing Supplies 1064 adjustable low fuel pressure alarm switch (optional)
12V 5A fused key-on power source
Wire and heat shrink connectors


Step 1: Anti Siphon Valve
Anti siphon valves are a USCG requirement for gasoline inboards. The purpose of these devices is to prevent fuel siphoning out of the tank if a fuel supply line is severed and filling the bilge with raw fuel, creating a potentially deadly condition. They contain a calibrated ball and spring valve that only allows fuel to be drawn from the tank by a suction greater than gravity. In simple terms, the fuel pump can draw fuel from the tank but fuel can not be drawn by gravity alone. You may find that someone has either removed these on your boat or they are in place and clogged or damaged. Functional AS valves are imperative to the proper operation of any fuel system so get them in there and make sure they are serviceable!
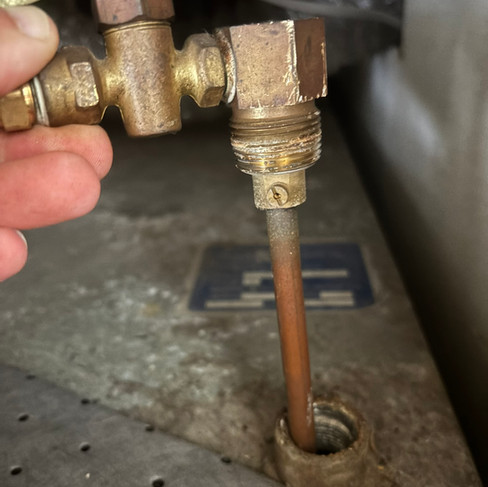
There are several types of AS valves depending on the the type of tubing or hose at the outlet of the fuel tank on your particular boat. The most common type is NPT x hose barb as shown below. My particular boat has copper tubing running directly from the tank up to the fuel filter so I opted to use a NPT x flare style AS valve also shown below.


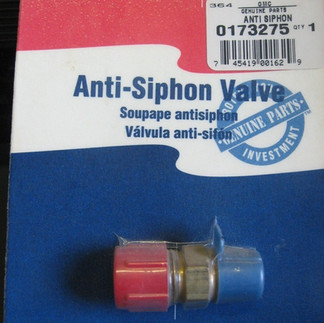
My boat came with a factory antisiphon mechanism consisting of a small air bleed jet in the tank pickup tube near the outlet. The idea behind this is that air entering this bleed would break a suction and subsequent siphon condition. It worked well from the factory and the mechanical pumps moved enough fuel were some added air in the mix didn't really impact performance. For the electrical pumps, its important that there are no air leaks on the suction side, so I removed the air bleed from the pickup tube and brazed it shut. The new AS valve will now take over for the factory one.


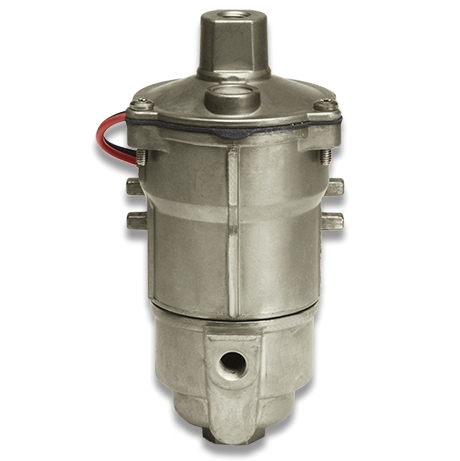
Step 2: The Electric Fuel Pump
This is a hotly contested debate as to which electric fuel pump is best for this application. When choosing a pump its important to note that most automotive style electric fuel pumps are made to be installed as close to the outlet of the fuel tank as possible and have a flooded suction supply of fuel at all times. Most are rotary-vane style pumps which utilize a spinning impeller to move fuel from the tank to the carburetor similar to the way a water pump works on an engine. They simply aren't designed to suck, or lift fuel from below their installed height. This creates a major challenge in some boats where the tank pickups are lower than where the pump can be installed, requiring the pump to lift fuel up out of the tank before it can be pumped to the carburetor. I have seen Holley "Red" marine pumps installed that operate on this principal and they simply don't provide a consistent output of fuel. My boat had these and the pressure gauges would be reading all over the place which is what made me start looking for better alternatives.
I selected the Walbro FRB-13 for several reasons:
Marine rated and ignition proof.
Uses the same operating principle as the mechanical pump (diaphragm).
Self priming
Capable of sucking fuel from up to 48" below its installed height.
Maintains constant pressure using variable speed results in longer pump life
Capable of 8psi of discharge pressure
Pumps a minimum of 43 gph or 163 lph (450+ horsepower capable)
So essentially I selected a pump that is doing exactly what the mechanical pump is doing but instead of the engine driving it, it is driving itself with electricity.

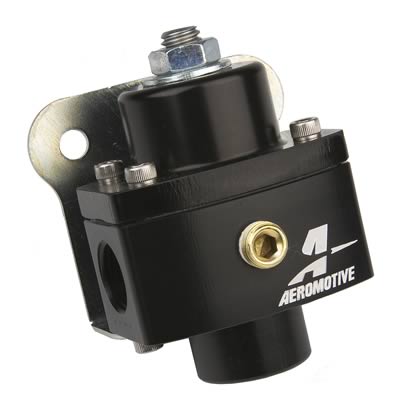
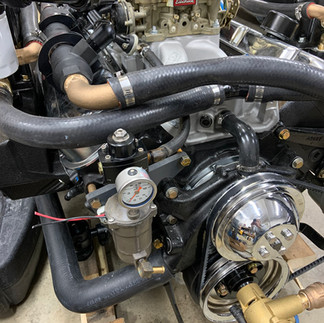
Step 3: The Fuel Pressure Regulator
The Walbro pump is capable of producing anywhere from 6-8 psi of discharge pressure which for many carburetors is perfectly acceptable. I run Edelbrock 1409 carburetors on my engines and they run best at 5.5 psi so installing an adjustable fuel pressure regulator at the discharge of the pump allows me to dial in the pressure perfectly using the gauge for reference. Ever have your engines stall at low speeds after extended idling? Too much pressure at the inlet to the carburetor can cause the bowls to overflow at idle and may result in stalling. After adding the FPR, the engines idle great both hot and cold and in neutral or in gear. The pressure gauge provides verification that pressure is spot on and is a great troubleshooting aide should you ever suspect a fuel delivery problem is present (pressure would be lower than the setpoint).


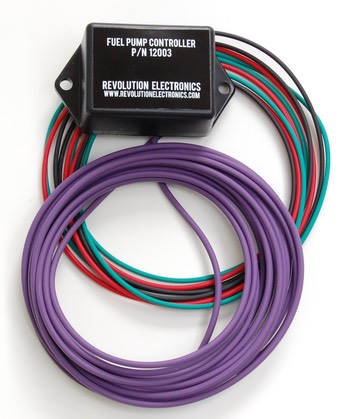
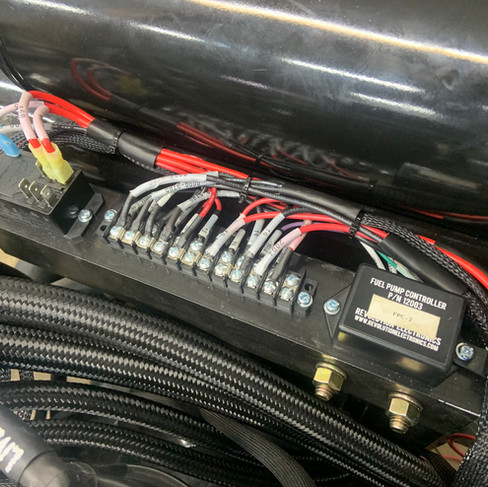
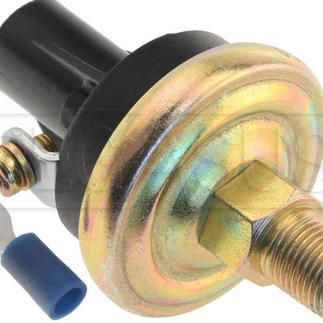
Step 4: The Fuel Pump Controller
USCG regulations state that an interlock must be present to prevent a fuel pump from delivering fuel to the engine if the engine is stopped. Some of the electric fuel pump conversion projects I saw online utilized an oil pressure interlock switch that would only allow the pump to run if the oil pressure was above 5 psi. Oil pressure is only present when the engine is running so its definitely a robust, simple solution. However, I found fault with this solution for two reasons. First, if the engine is idling very low with hot oil, there is a chance that oil pressure (especially on an older engine) could hover around the 5 psi mark and cause the fuel pump to shut off unexpectedly. When is this scenario likely? When docking of course. Last thing I wanted was to lose my fuel supply when I'm navigating the tight fairway at my marina. Second reason is when starting the engine cold, it can take several seconds of cranking before enough oil pressure is built up to turn the fuel pump on. Add the amount of time it takes to fill the empty fuel bowls in the carburetor mentioned earlier in this blog and you might as well stick with mechanical pumps with the amount of cranking involved to get the engine started.
I came across a great little controller that ties into the tach signal of the distributor and will allow the pump to run anytime above 0 RPM, so no waiting for fuel pressure to build and no worry about losing fuel pressure in low oil pressure situations. A bonus feature is a priming cycle that runs the pump for 3 seconds with the engine off after ignition power is first applied. Now I have the benefit of filling the carburetor bowls with fuel before I start cranking over the engine!


Step 5: Fuel Pressure Alarm Switch (Optional)
I wanted a way to know if my engines were starving for fuel and also an indication of when the fuel bowls are filled during the priming cycle so I added an adjustable low fuel pressure switch that when triggered sounds an alarm at the helm. I set the low fuel pressure switch to trigger at 4 psi and below. The carburetors I have require 5.5 psi at all times and I wanted to be notified well in advance if they are not getting fed properly before risking running the engines lean and damaging them.


Summary
I have had this system installed since 2021 and it has been 100% reliable with no component failures. Its been a great addition to the boat and takes a lot of the guesswork out of troubleshooting. I have seen dozens of posts from boaters stating that their boats won't reach high RPM and if any one of them had a system like this installed they would quickly know if the problem is fuel flow related.
The only complaint I have about this system is the 3 second priming cycle is not nearly long enough if the boat has been sitting for more than a couple of days. It is not an adjustable setting so my pre-starting routine is I turn the engine switch to run, let the prime cycle complete and then turn the run switch to off. I repeat this process until the low fuel pressure alarm stops. After that I give the throttles 3 good pumps an leave them 1/8 open and hit the start button. Starting is instantaneous using this method. Best of all, no more beating the crap out of the starters weekend after weekend!


Comments